Reinstalling Proxmox on my Desktop
Sigh. My Desktop just got back home again. And, well, its hdd just got corrupted with all my vms, proxmox installation and games. That’s nice. You can imagine how happy I am now.
Anyways, this post is about documenting the process to reinstall and share my pci express vga again. Let’s do this!
Oh, and before anything, a quick description of my hardware, this will help me to understand what my pc was at this point in time: Processor: i5 7400 Motherboard: H110M-HG4 RAM: 24GB VGA: GTX 1060 6GB
From the ground up
Since I was going to document everything from the beginning, I thought about writing stuff that happens before Proxmox installation. So what I did was to restore the factory defaults in my bios. Here I will be writing (and hopefully showing) the configuration I did in the bios setup step-by-step.
Ok, when I booted up no image was shown in the onboard hdmi output. This meant that the motherboard recognized my gtx 1060 as the default adapter. This meant I had to change this setting. This was the path:
- Press F2 while booting to enter setup;
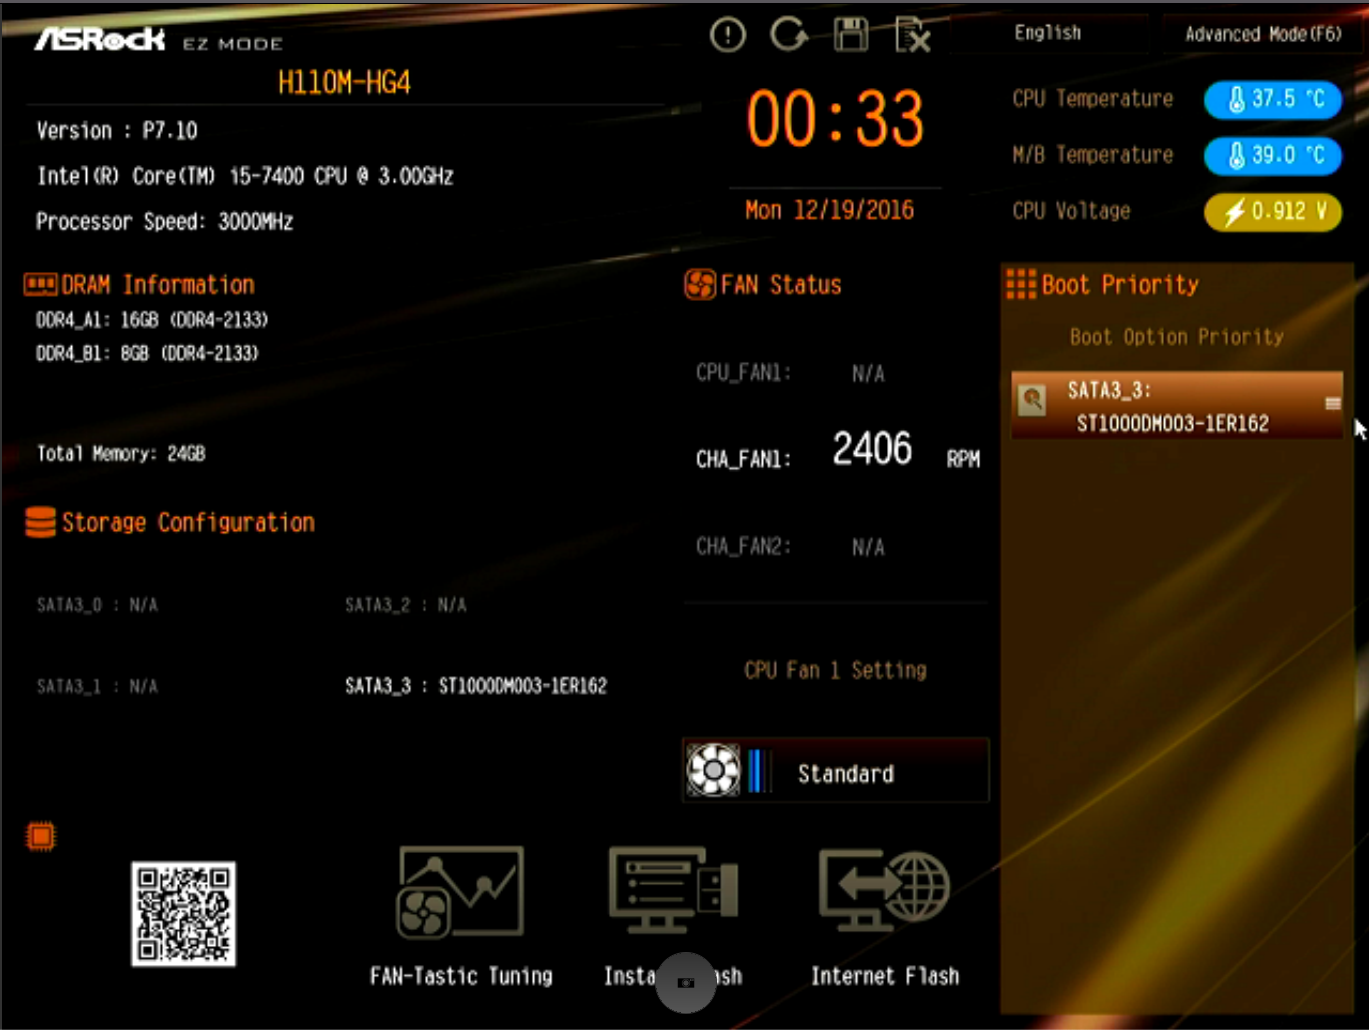
- Once on this screen press F6 to go to advanced mode:
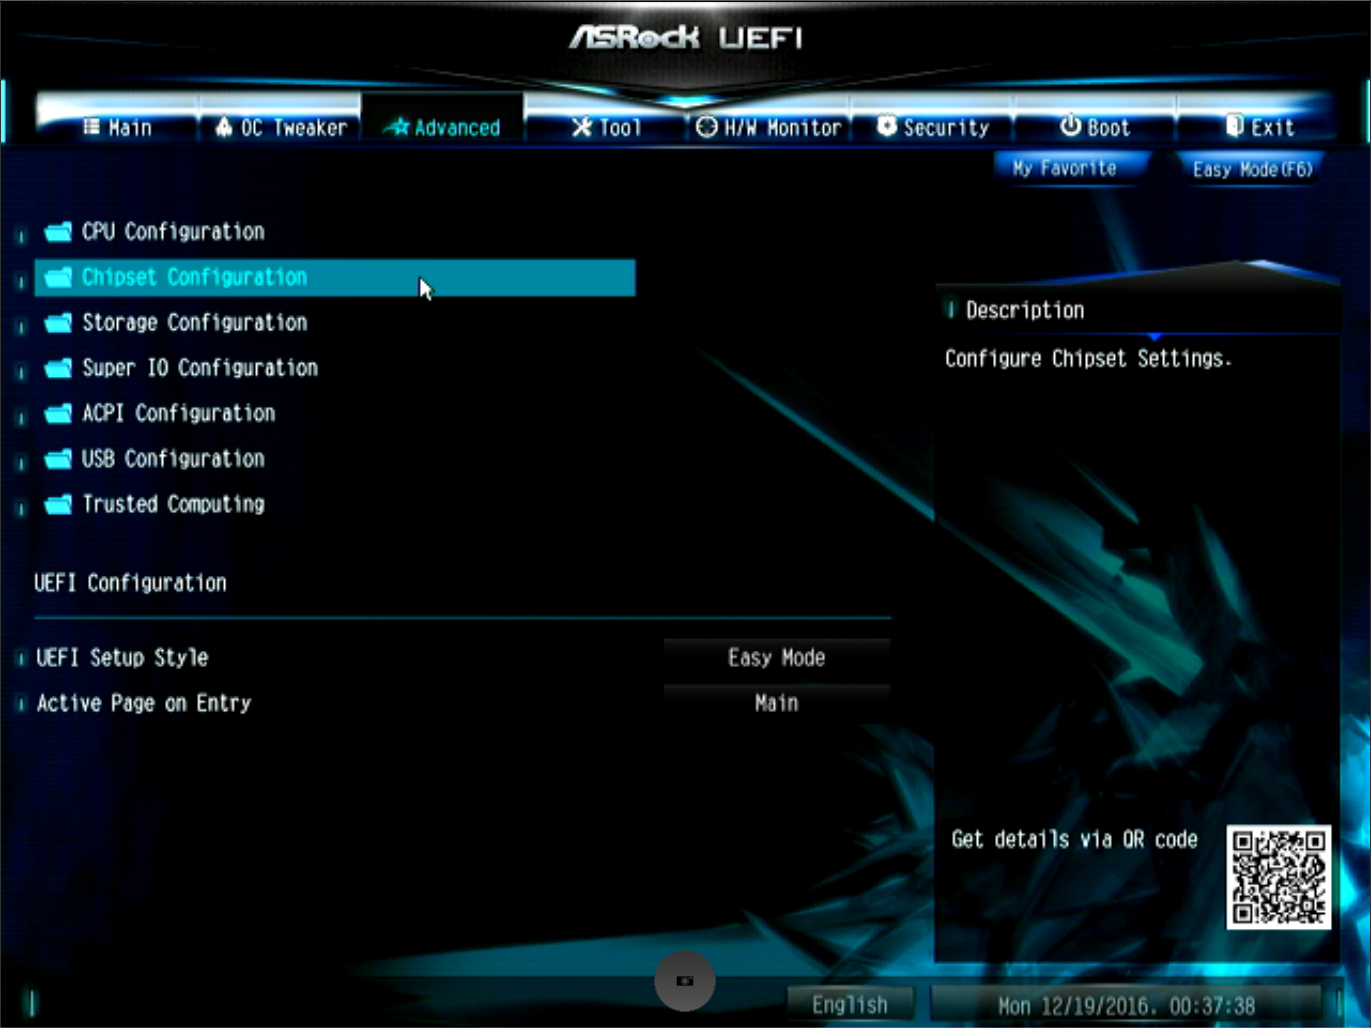
- Then go to Advanced > Chipset Configuration:
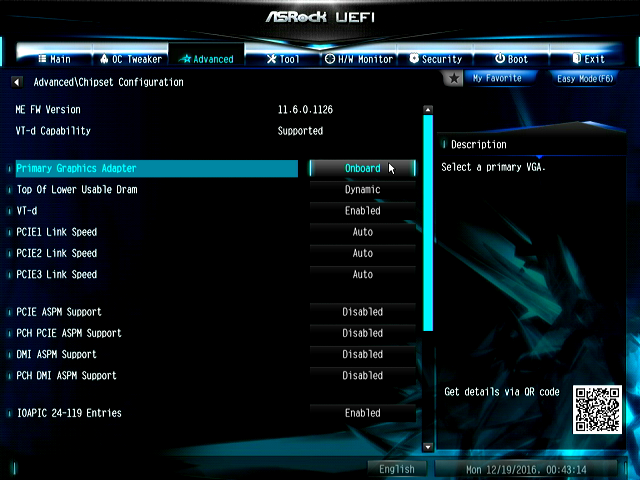
- Then change Primary Graphics Adapter from Pci Express to Onboard:
- Then hit F10 to save and reset. Change the hdmi cable to the correct output port and go back again to the setup part and press F6.
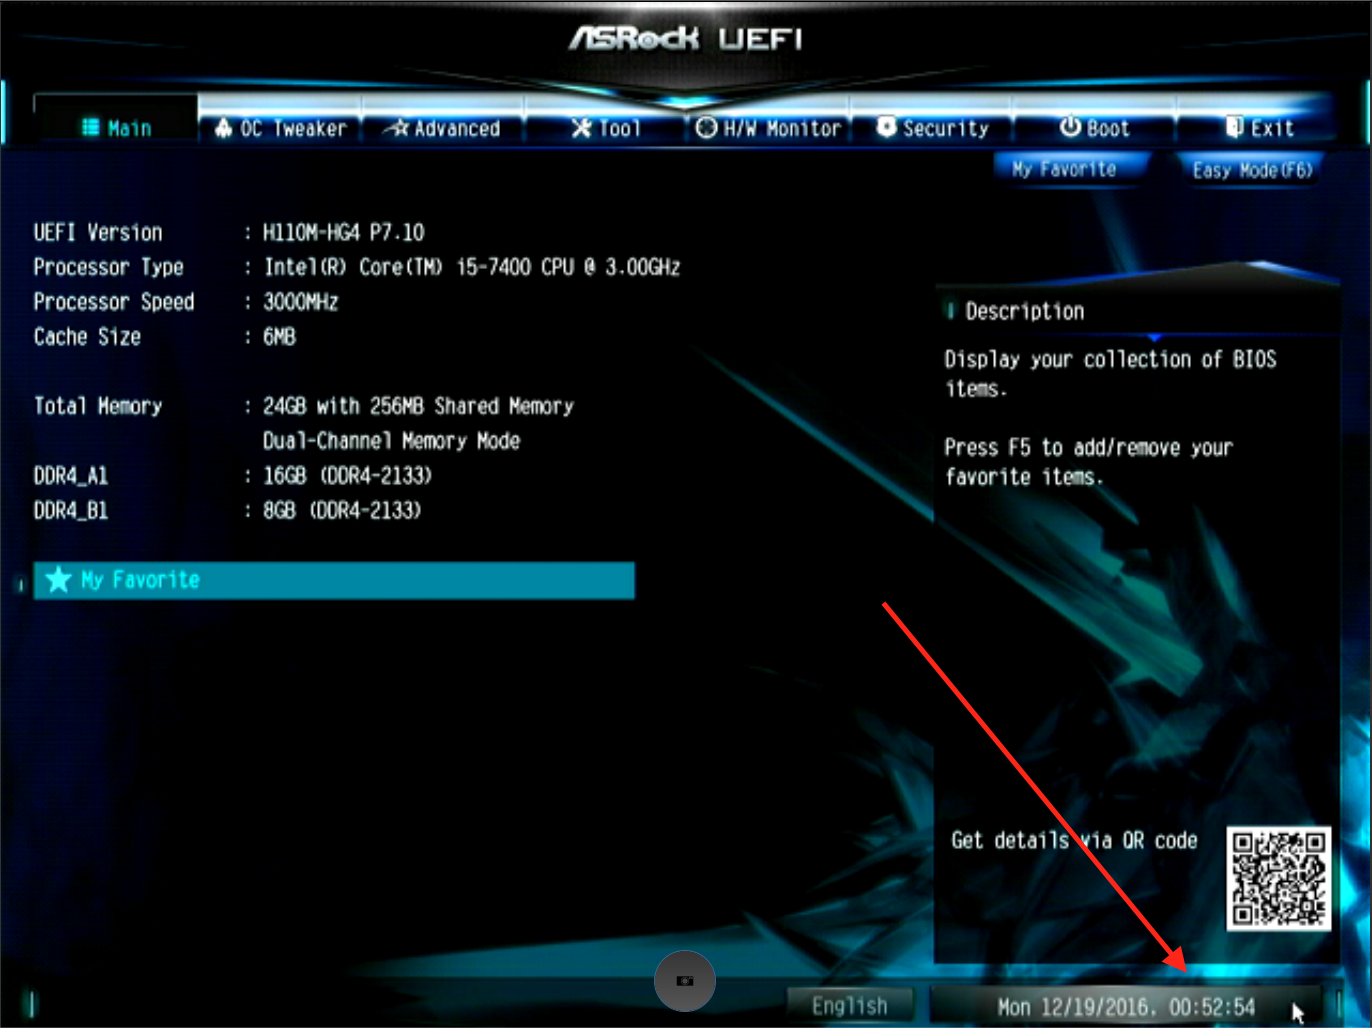
- Let’s fix system date, go to the bottom-right of the screen and click on the timestamp to set up the correct date:
- Fix your time settings and click OK. Next, go to Advanced > Chipset Configuration and Check if VT-d is enabled (this is needed to do GPU passthrough later):

- Also check if your HDD is the default boot device. Go to Boot (top of the screen) and check if your HDD is the Boot Option #1:

- Go to Advanced > Chipset Configuration, scroll all the way down to the bottom of the page and check if Restore on AC/Power Loss settings it set to the desired option. In my case, I needed my desktop ON all the time, so I chose Power On:

- Check if Serial Port is enabled in Advanced > Super IO Configuration. This is useful if you need to connect to your desktop via serial interface, when you do not have a monitor available.
- Finally, go to Security and click on Supervisor Password to set a new password for your setup:

- Hit F10 so save and reset.
Installing Proxmox
Before booting again, insert an USB flash device with Proxmox ISO setup on it. Then, while booting, press F11 to select USB boot (you will be prompted for the admin password):


Once in Proxmox boot logo, select “Install Proxmox VE”.

Click “I Agree” in the license screen (well, otherwise you won’t be able to proceed with installation). Then you will be presented with a new screen where you will select the disk where Proxmox will be installed, check if this is really your option (if you need to change your partition setting, click on Option):

Then you will be presented to a language settings screen: choose your region, keyboard, etc. After this, set your root password in the next screen. Then set your proxmox server network settings:

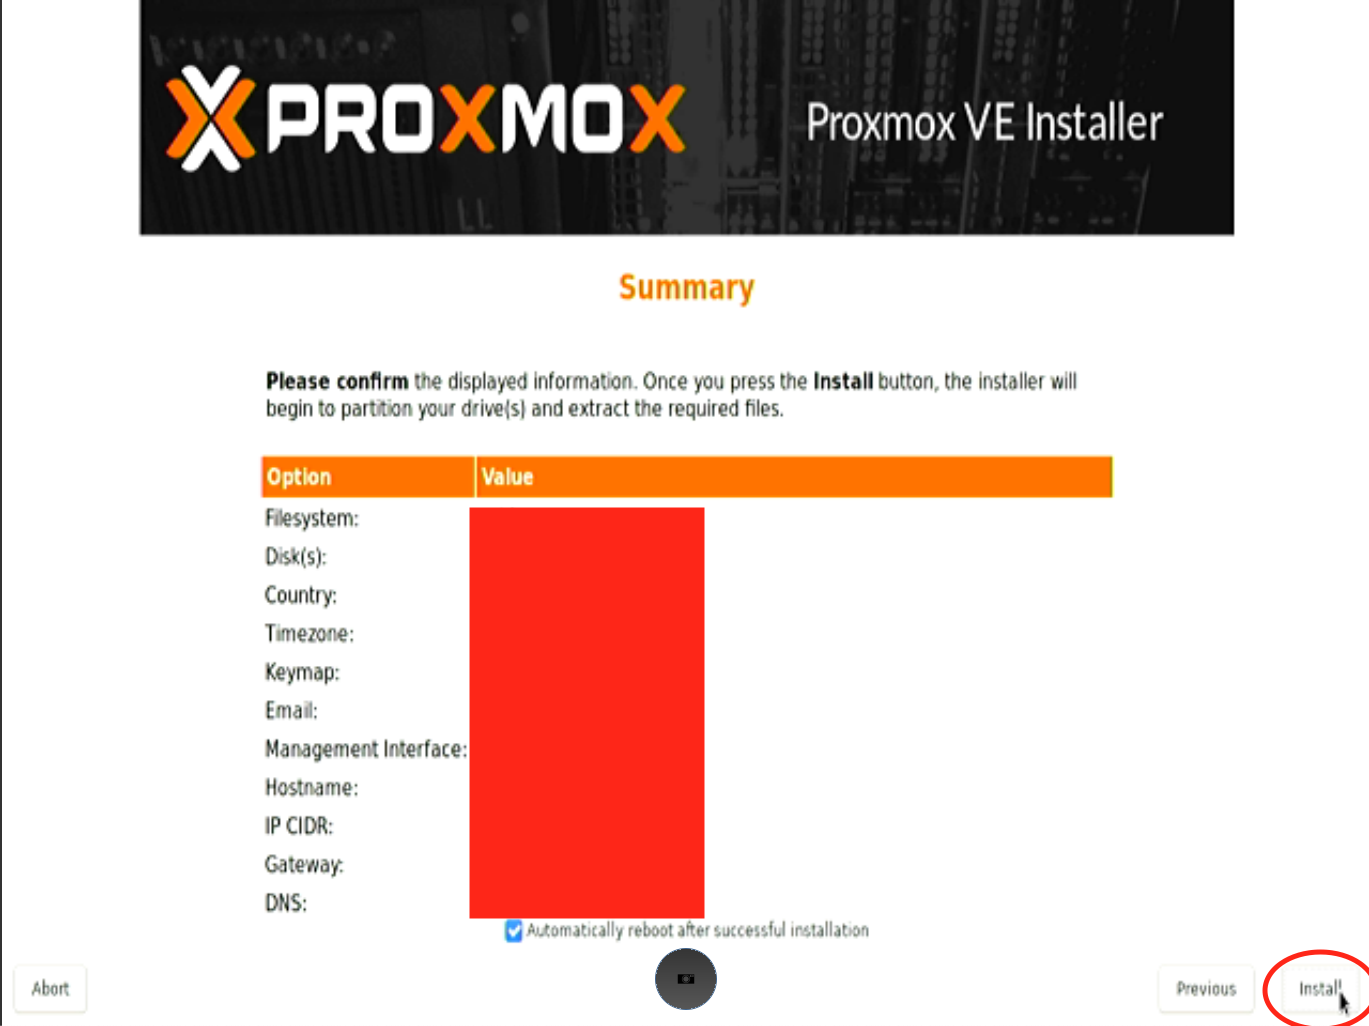
Finally review your settings in the last screen and hit Install! The installation will automatically reboot after it finishes. Please be patient.
The license annoyance
When the system reboots after installation, you will be prompted to login using your root user credentials. If you want to access your proxmox server through the network, you can already do this via SSH.
You can also get to the proxmox web interface by typing http://your.host.ip:8006/ in your web browser of choice. One thing, by the way, that annoys me, is the license nag that shows up every time I login via web. Let’s take care of this then:
sed -Ezi.bak "s/(Ext.Msg.show\(\{\s+title: gettext\('No valid sub)/void\(\{ \/\/\1/g" /usr/share/javascript/proxmox-widget-toolkit/proxmoxlib.js && systemctl restart pveproxy.service
Change the sources.list entry to the community one (you can only use proxmox’s official repository if you pay for the license). Copy and paste all lines at once:
cat << EOF > /etc/apt/sources.list.d/pve-community.list
# non production use updates
deb http://download.proxmox.com/debian/pve bullseye pve-no-subscription
EOF
Comment out the enterprise one:
sed -i '1 s/^/#/' /etc/apt/sources.list.d/pve-enterprise.list
Then update the repositories:
apt update
If desired, upgrade all packages:
apt upgrade -y
Some useful packages
I installed these packages to make my life easier:
- Lynx - a command line browser. Sometimes I needed it.
- Docker and docker-compose - run containers of course
- Tmux - to leave some processes running in the background.
- Vim - my favorite text editor.
- Wireguard - my vpn of choice.
- Proxychains - bypass some wireguard problems.
To install these I ran:
apt install lynx docker.io docker-compose tmux vim wireguard proxychains4 -y
GPU passthrough
This is basically a repetition of Proxmox’s official guide, but highlighting the commands that worked out for me.
OK, first thing is to enable IOMMU, to do this, edit /etc/default/grub and add “intel_iommu=on” to GRUB_CMDLINE_LINUX_DEFAULT. After adding it, the line should look like this:
GRUB_CMDLINE_LINUX_DEFAULT="quiet intel_iommu=on"
In one line:
cp /etc/default/grub /etc/default/grub.bak && sed -i '/GRUB_CMDLINE_LINUX_DEFAULT/c\GRUB_CMDLINE_LINUX_DEFAULT="quiet intel_iommu=on"' /etc/default/grub && cat /etc/default/grub
Update grub:
update-grub
Then reboot:
reboot
Once logged in again, check if iommu is indeed enabled:
dmesg | grep -e DMAR -e IOMMU
The output should look something like this:
...
[    0.042446] DMAR: IOMMU enabled
...
Then it worked. According to the original guide, if something went wrong, the output would be empty.
Now let’s enable the needed modules:
cp /etc/modules /etc/modules.bak && cat << EOF >> /etc/modules
vfio
vfio_iommu_type1
vfio_pci
vfio_virqfd
EOF
Then reboot again. Once logged in, let’s blacklist all nvidia drivers on the host (we also blacklist radeon here, just in case). This is needed to leave the video card alone so our VM can own it:
cat << EOF >> /etc/modprobe.d/gpublacklist.conf
blacklist radeon
blacklist nouveau
blacklist nvidia
EOF
Now go to the terminal on your host again and get your PCI Express VGA address, to do this run this command:
lspci -n -s 01:00
This was my output, for example:
01:00.0 0300: 10de:1c03 (rev a1)
01:00.1 0403: 10de:10f1 (rev a1)
We can see that my VGA has the address 10de:1c03 and its audio device has address 10de:10f1. Use these addresses in this command:
echo "options vfio-pci ids=10de:1c03,10de:10f1" > /etc/modprobe.d/vfio.conf
Once more, reboot. This should do it do the host, let’s go to the VM.
Testing GPU passthrough in a Ubuntu VM
Go to proxmox’s web interface on your browser of choice and login as root. (address is https://your.host.ip:8006/)
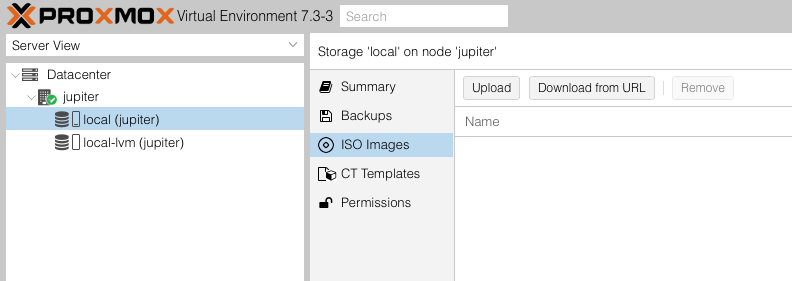
After this, go to Your host > Local > ISO Images. Then click “Download from URL”:
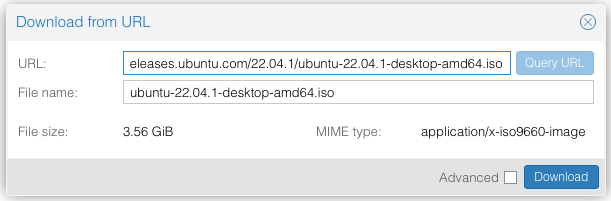
Paste Ubuntu ISO download link into the “URL:” text field and click Query URL. Then click Download:
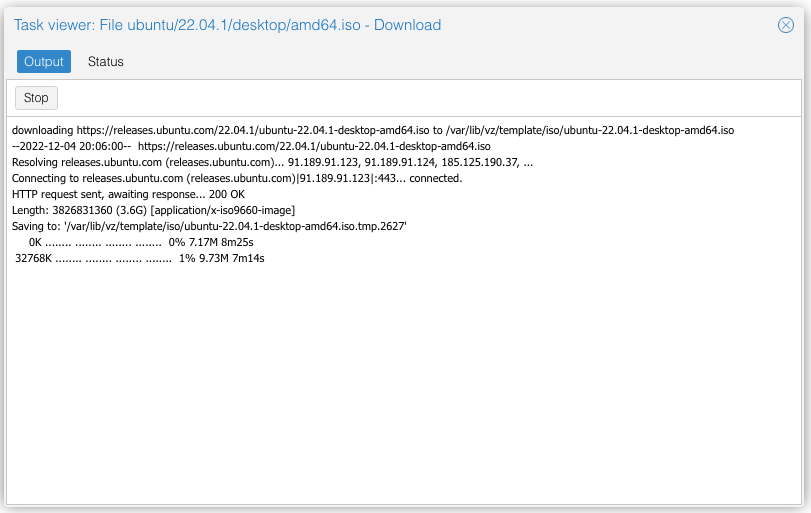
You’ll see an output windows, wait for the download to finish and then close it:
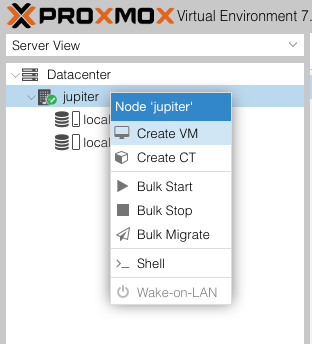
Then right click your host in the left column and click “Create VM”:
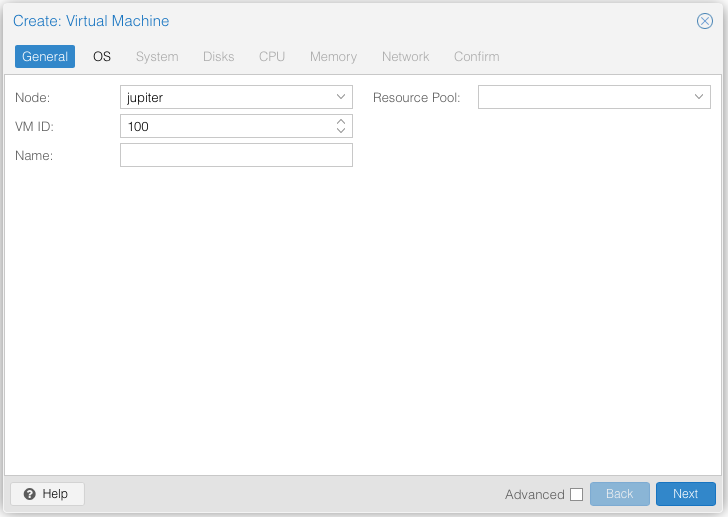
Leave node and ID as default:
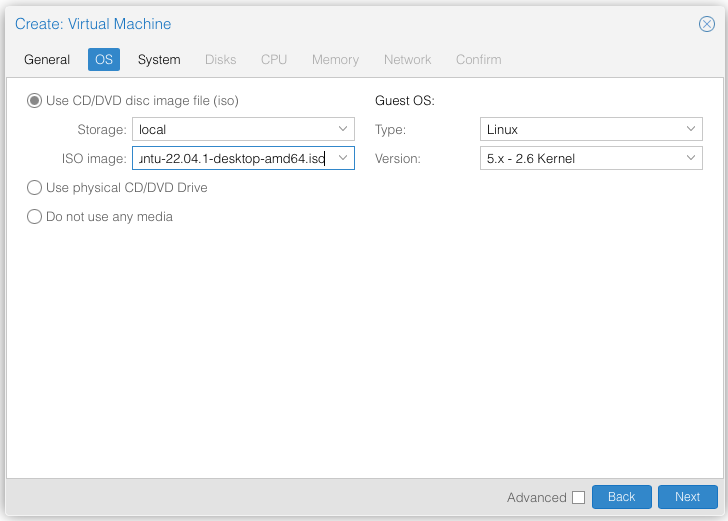
Select the ISO you just downloaded:
In the next screen set Graphic Card as Standard VGA, Machine as q35, Bios as OVMF (UEFI). The rest leave as default:
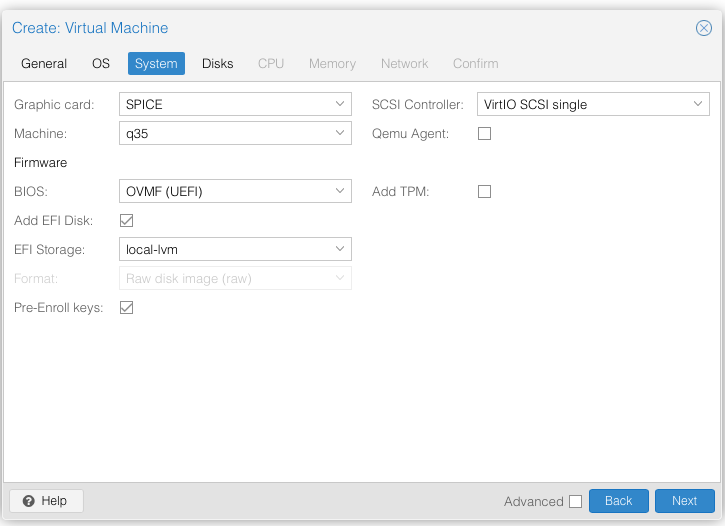 (PSST.: In the image I selected SPICE, but later I realized it was not a good choice because it doesn’t work well with novnc)
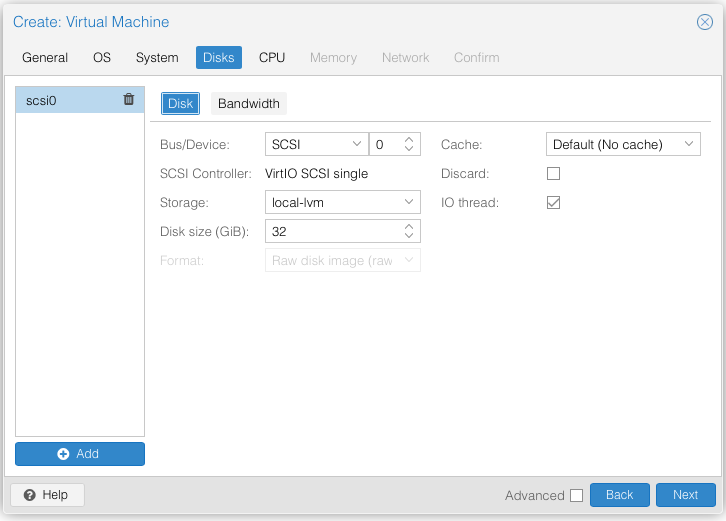
Select the disk size as desired:
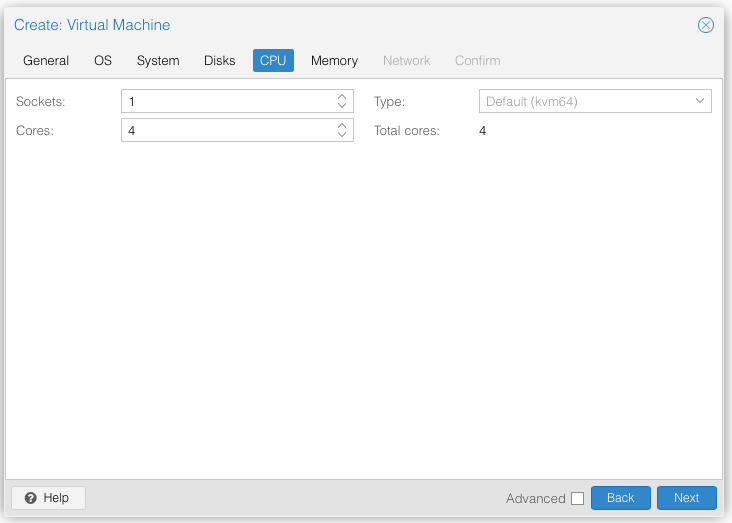
As well as the number of CPU cores:
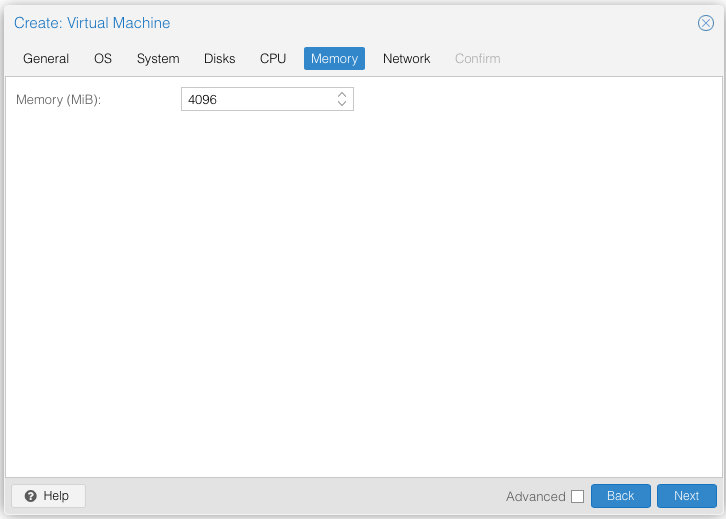
Also inform the amount of desired memory:
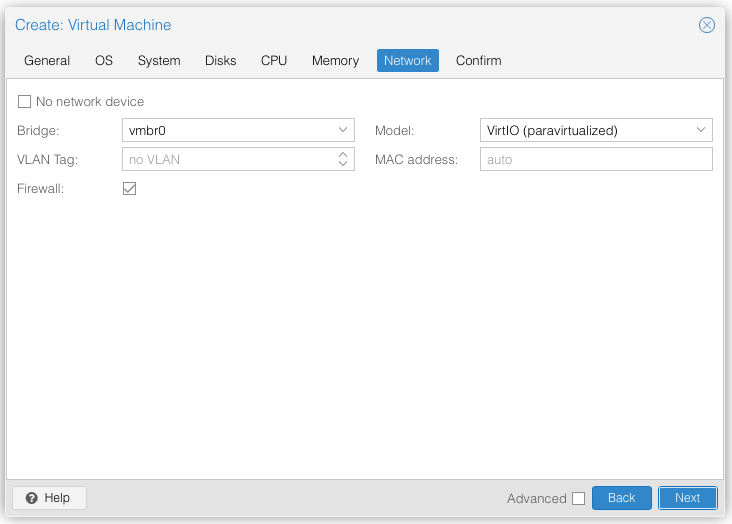
You can leave network as default:
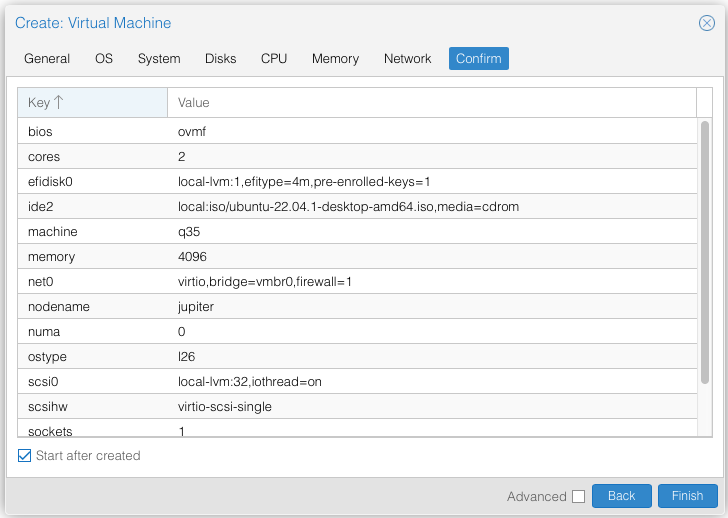
Review, tick “Start after created” and Finish:
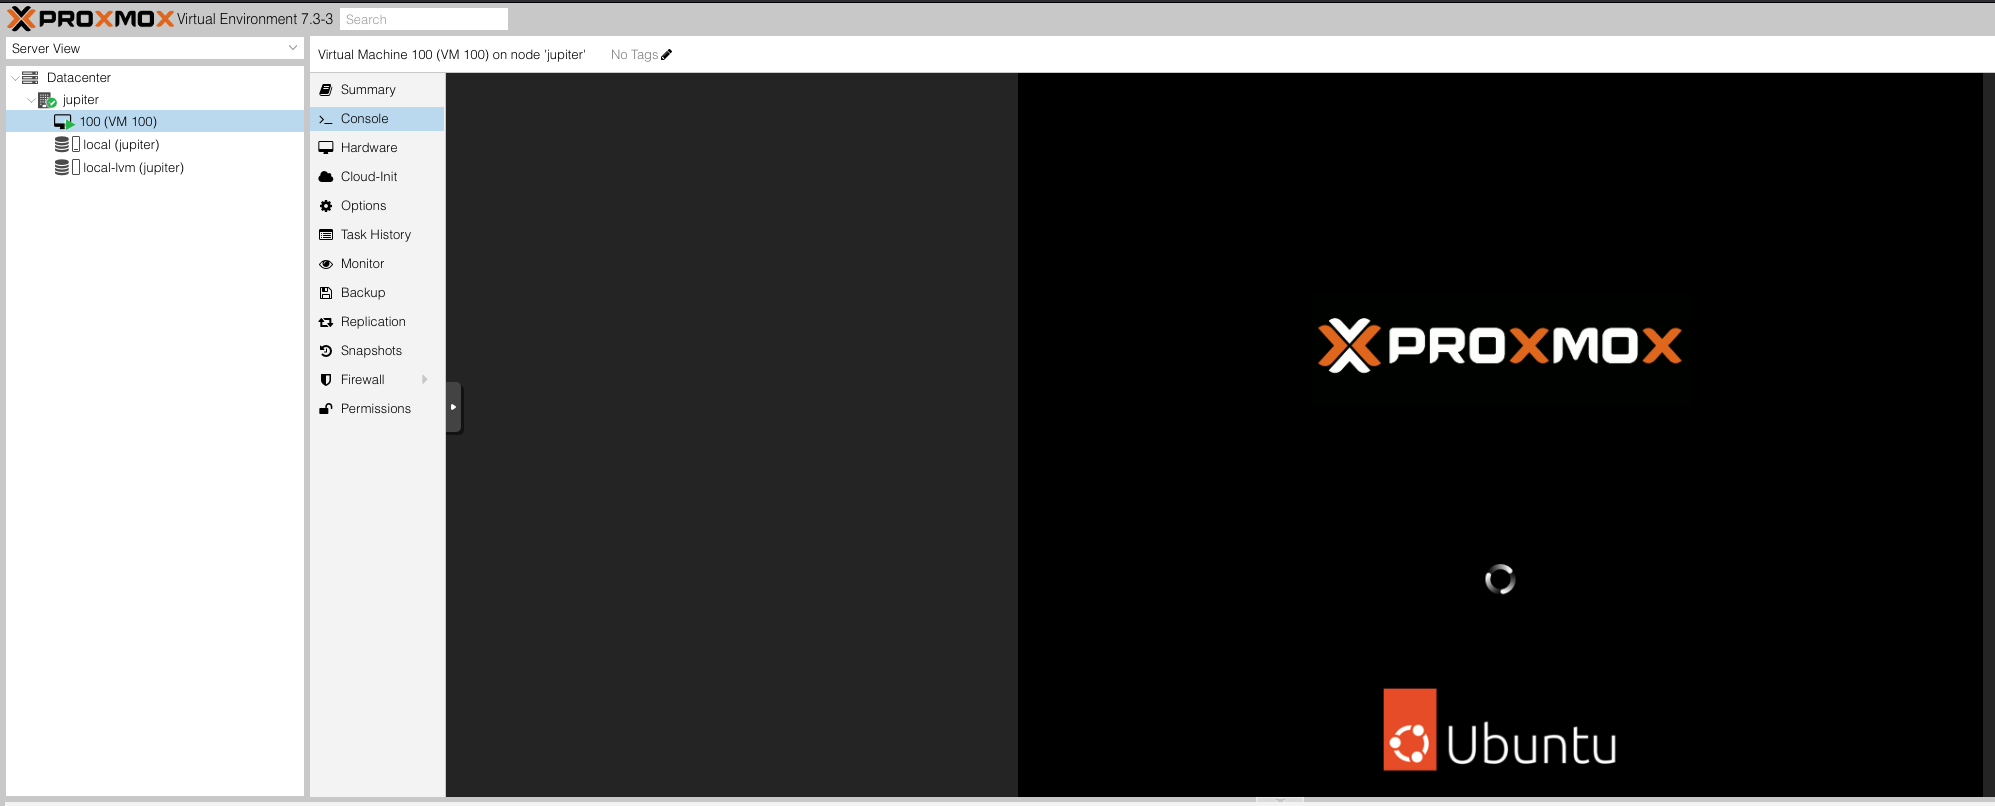
Then click on your VM > Console to see the video output:
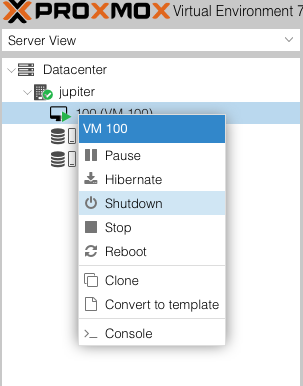
Proceed with the installation as you would normally. After finishing the installation, when Ubuntu is asking to remove the installation media and press ENTER, we can shutdown it. Right-click you VM and select Stop:
If you get some error like “can’t lock file ‘/var/lock/qemu-server/lock-xxx.conf’ -got timeout”, do this in a terminal:
export VMID=100 #or your id
rm /run/lock/qemu-server/lock-$VMID.conf
qm unlock $VMID
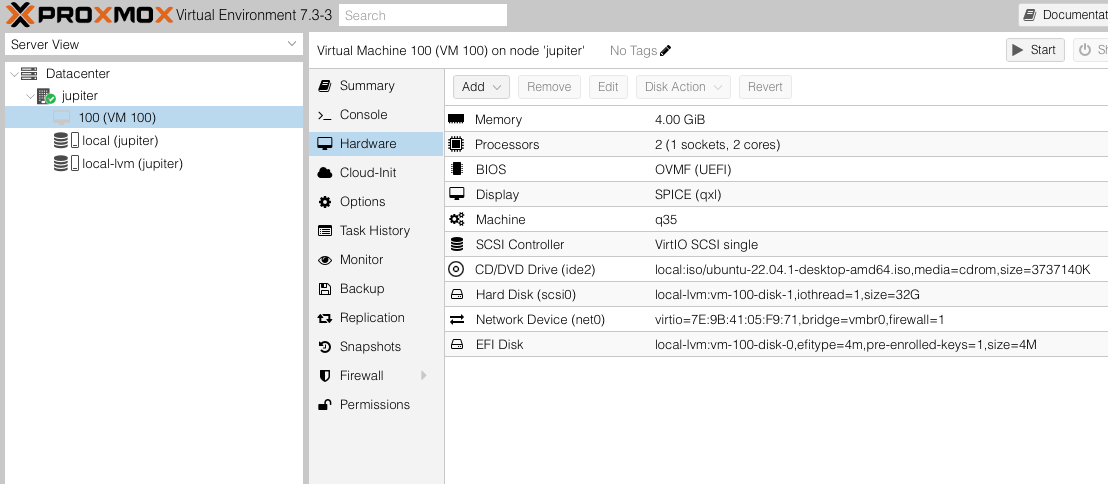
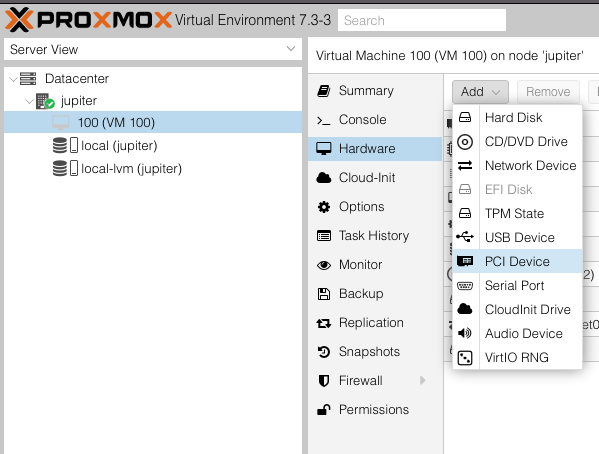
Now, back to the web interface, go to Your VM > Hardware:
Click on Add > PCI Device and this window should pop up:
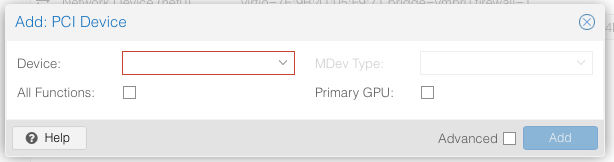
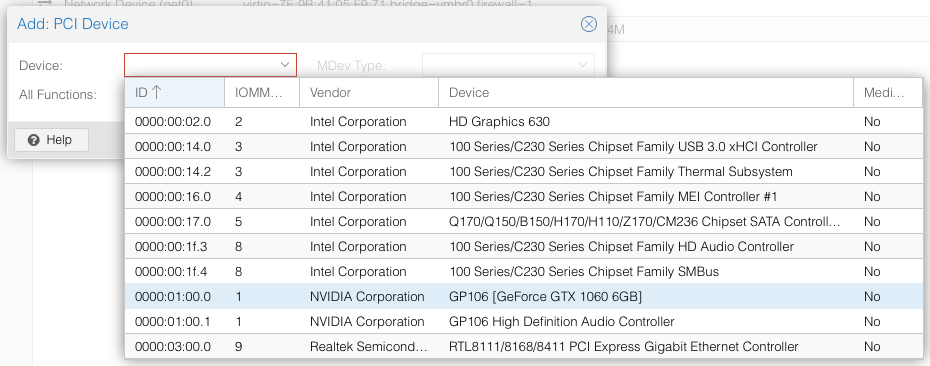
Then click on the “Device:” dropdown list and select your PCI VGA, then click OK:
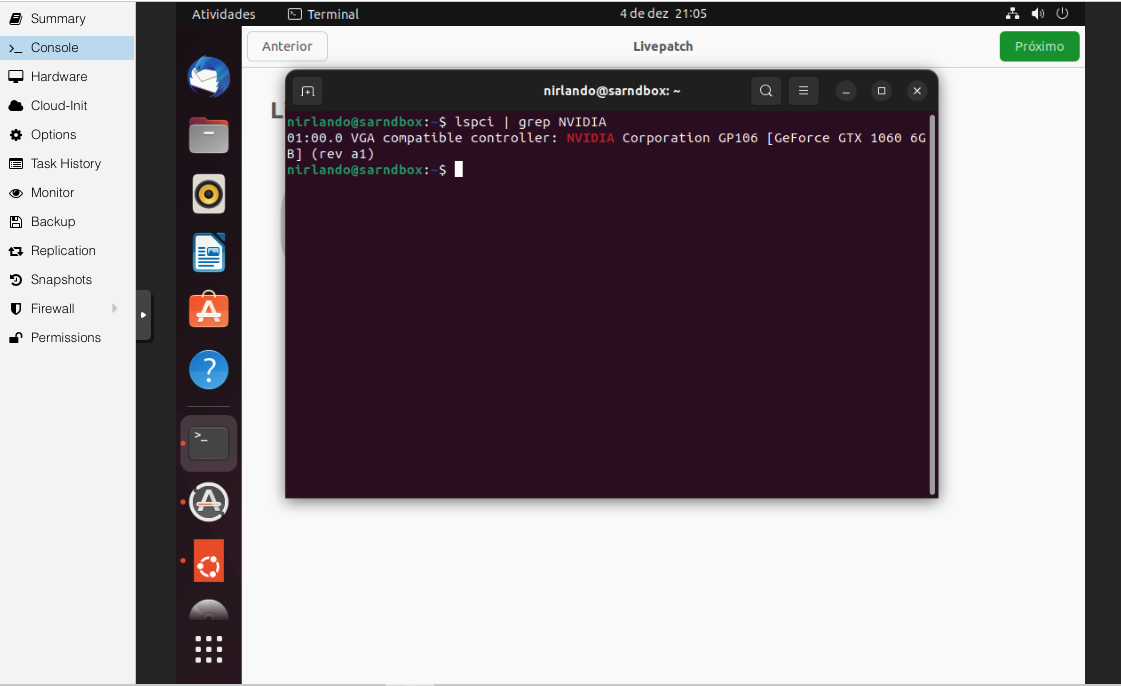
Then you can power on your VM and go to its console again. Once booted up, login and open a terminal. Then type:
lspci | grep NVIDIA
You should see your adapter there:
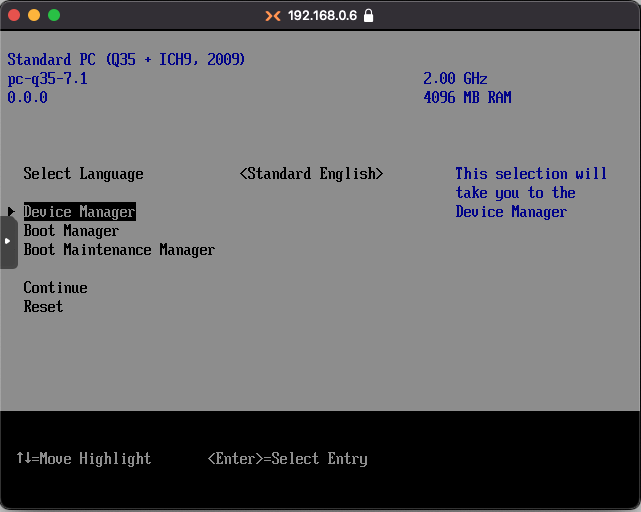
Now, before installing the driver, we need do disable secure boot. Reboot your Ubuntu by typing reboot into the terminal and, when proxmox logo appears, keep pressing Esc until you get to this screen, select device manager:
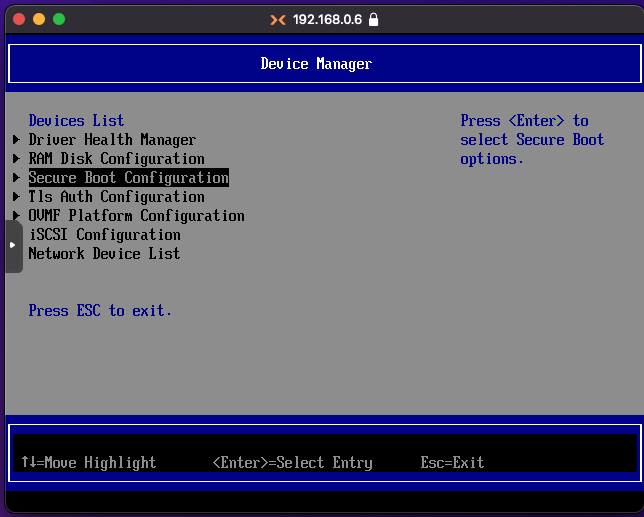
Then Secure Boot Configuration:
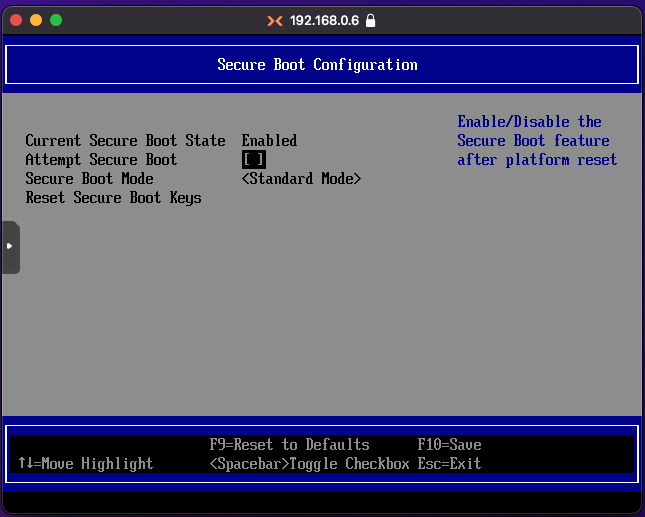
Then select Attemp Secure Boot and press Space to disable it and press F10 to save and reboot by pressing Esc and Continue in the first screen:
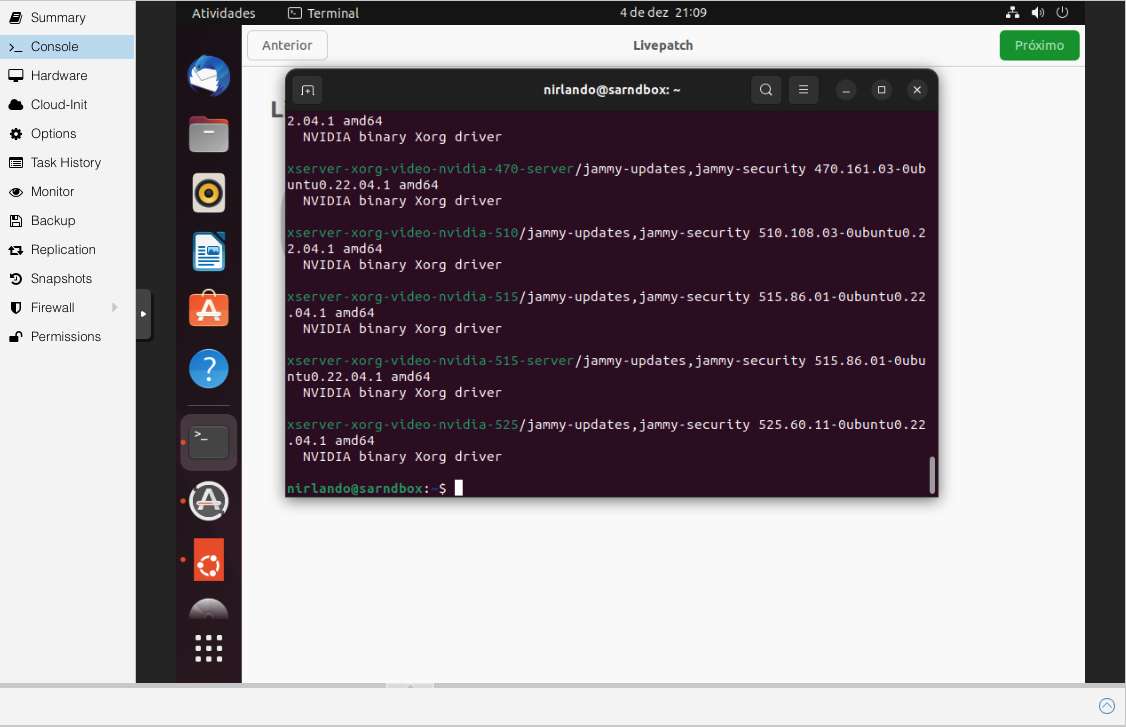
Once Ubuntu boots again let’s install the driver, type:
sudo apt search nvidia-driver
See the latest line? It contains a number, in my case it was 525:
Then we install the driver 525 (this may take a while):
sudo apt install nvidia-driver-525 -y
Once the installation completes, shutdown the VM:
sudo shutdown -h now
Optional: Then go to Your VM > Hardware > Display:
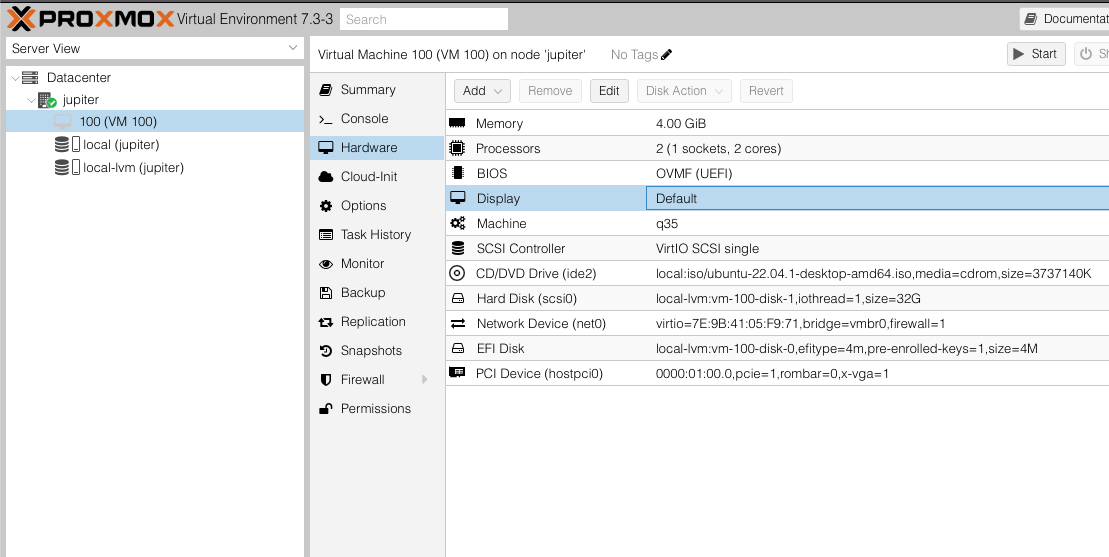
Optional: Select Default and press OK.

Optional: This will make your VM stop outputting video to the NoVNC console and use the VGA HDMI/Displayport output, just in case you want to use a real monitor. If not, just ignore these optional steps.
And we are done for this! Wheeeew!
I hope next time I am able to connect to this PC using a serial port. But these are scenes for the next chapters!!!